Business, Productivity, Technology
How to create labels in Gmail
April 29, 2020
If your inbox is a mess and you can’t find anything perhaps it’s time to create labels in Gmail. It’s the tool I use most in Gmail. Labels help me to keep everything neat and tidy, to organise and find messages easily. It takes a bit of time and thought to set up but once you get into the habit it becomes second nature. It’s important to note that labels can’t be set up via a mobile device but only on a computer. Once set up they work on any mobile devices that are linked to your Gmail account.
What are Gmail labels?
A Gmail label is like a folder but better! They can be applied to every email you receive or send. Unlike a folder you can add more than one label to a single email, making searching for a particular email easier.
How to create a label.
There are two ways to do this.
Method 1.
Log in to your Gmail account on a computer.
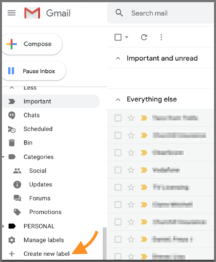
Scroll to the bottom of the left hand side bar and click ‘More’.
Here you’ll see the ‘Create new label’ button. Click this and give your label a name.
Method 2.
Open the message you want to label and the ‘Labels’ button will appear below the search bar.
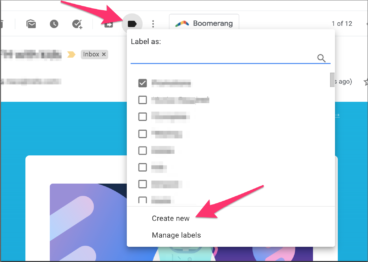
Click on the ‘Labels’ button then scroll down to ‘Create new’.
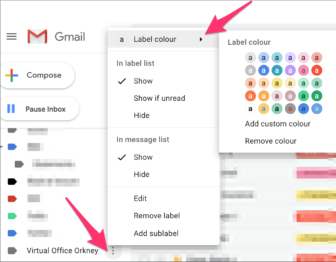
Once the new label has been created it’ll appear in the left hand side bar. You can leave it at that or add a colour to the label. I like to do this as it’s just another way of differentiating between labels.
To add a colour just click the three dots beside the label name and pick the one you want.
How to label an email.
Again, there are two ways to do this.
Method 1.
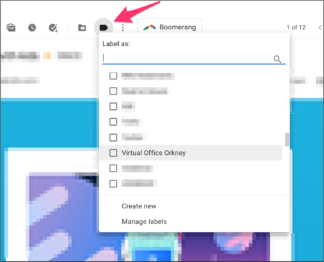
Open a message and click on the ‘Labels’ button below the search box. Choose the label you want from the list.
Method 2.
Drag and drop the label from the left hand side bar onto the email you want to label.
With both these methods the email will stay visible in the inbox but will have the label attached.
Labels as folders.
Once you have labelled your emails you can then remove them from the inbox. Access to them is through clicking the label names you have set up. There are four ways to do this.
Method 1.
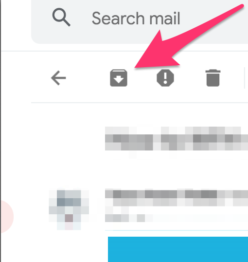
If the message is already labelled, hover over it in the inbox and buttons will appear at the right hand end of the line.

Click the ‘Archive’ button. The message is now stored under the label name in the left hand side bar.
Method 2.
If the message is already labelled, open the message and click the ‘Archive’ button below the search box.
Method 3.
Open the message and click the ‘Move to’ button below the search box.
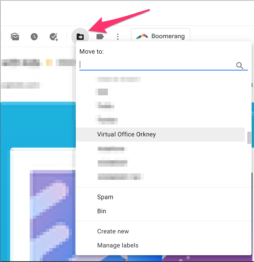
Click on the label you want to move the message to.
Method 4.
Drag and drop the message on the label you want in the left hand side bar.
All four methods remove the email from the inbox and store it in the label (or folder) until you want to view it again. Simply click on the label name and all the emails in that label will appear.
How to label an outgoing email.
Click ‘Compose’ and look for the three dots in the bottom right corner of the window.
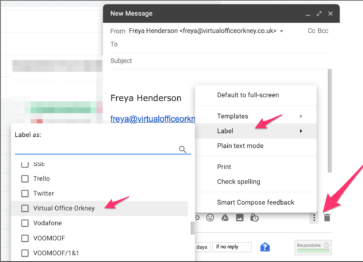
Click them and choose ‘Label’ from the menu that appears. Then choose the label name you want from the list.
Labels are a great way to organise your emails. Why not make a start on your inbox? It’s well worth the time.